HOW TO BREW COFFEE 101
Coffee is composed of a world of chemical compounds. When you grind whole bean coffee and introduce water to those grounds, some of those compounds (specifically soluble flavor compounds) are imparted to the water. This process of imparting is called extraction and it’s how we get brewed coffee. The best brewed coffee has an even extraction, full of all of the great stuff and none of the not-so great stuff. A skilled brew is all about learning how to finesse the three three key variables that determine how many particles end up extracted: temperature, turbulence, and time.
Let’s go over some terms and definitions before we dig in:
Bed - the ground coffee in the filter
Slurry - ground coffee that is actively brewing with water
Bloom - the process of allowing gas trapped in the coffee during roasting to be released before brewing; think of it as unlocking the coffee so it can be properly extracted
Crust - coffee grounds that rise to the top of the slurry
P.S. If you’re more of a visual learner, we have a companion YouTube video you can find here or at the bottom of this post.
WHAT IS AN EVEN EXTRACTION LIKE?
We’ll start with what we’re avoiding.
- Under-extracted coffee hasn’t pulled enough flavor from the coffee. It has all of the acids and none of the great fats and sugars, so it tends to taste sour and the flavor disappears quickly.
- Over-extracted coffee has pulled too much of all the good stuff, which gets lost in a wash of bitterness from caffeine and other chemicals. Coffee that is over extracted has a lingering, drying finish that tends to suck the moisture out of your mouth.
What we’re aiming for with our extractions is a balance of acidity and sweetness/fats. We want a uniform and even extraction that is all-around pleasant without harsh bitterness or sourness.
Coffee that is extracted well is full of sweetness, balanced acidity, complexity, and pure joy.

HOW DO I CREATE AN EVEN EXTRACTION?
Water takes the path of least resistance. A lot of what it takes to create an even extraction is distributing the coffee grounds and water evenly before and during brewing.
Grind Particle Distribution
Ideally, all grind particles should be the same size and have the surface area. In reality, all grinders produce particles in a spectrum of sizes, and particles of different sizes extract at different rates. Smaller particles extract more quickly and larger particles more slowly. Because of this, there will always be a slight unevenness when extracting ground coffee. The goal is to produce coffee grounds that have the least amount of spread in grind particle size. It comes down to purchasing and maintaining a quality burr grinder.
Bed Distribution
You need the coffee grounds to be level before you add water. An even bed means that water will enter the coffee with a similar resistance across the entire coffee bed ensuring all of the grounds will extract at roughly the same time.
Water Distribution
This is different for various brew methods, but the goal is the same: pour consistantly in a way that allows the bed to extract evenly. Use a steady and even pour, making sure you aren’t favoring one side of area of the slurry. Pouring in concentric circles is a best practice for even water distribution.


PRINCIPLES OF EXTRACTION: THE 3 T’S
Now, let’s dive into true mastery of brewing. There are three key variables in the brewing process that you have to understand and use to create the perfect brew: temperature, turbulence, and time. These three T’s build on one another and work together to make or break your brew.
Temperature
Most compounds are more soluble at higher temperatures. This means that ground coffee will extract faster with higher water temperatures. It is recommended to use water hot enough to achieve a slurry temperature of 201°F-205°F. Colder than this, and you won’t be extracting everything the coffee has to offer, and it will likely be sour. Hotter than this, and you’ll over-extract and end up with bitter, burnt coffee. This is probably the easiest variable to get in the right spot. A thermometer really comes in handy here, but if you don’t have one, you can hit that perfect temperature range by bringing your water to a boil, then removing it from heat until it settles, about 10-20 seconds.

Turbulence
The next variable to understand and utilize is turbulence, or, the mixing of grounds, gasses, and hot water during coffee brewing. Turbulence can be caused by agitation of the slurry by an external force, such as stirring, as well as the impact of the brewing water as it hits the slurry. This type of agitation accelerates extraction and generally improves the uniformity of extraction. The degassing of coffee grounds as they become saturated can also be considered a cause of turbulence. This variable is a great tool to use not only to create a more uniform extraction, but also to help manage time. As a general rule, creating more turbulence will speed up extraction time and vice versa.

Time
Time refers to the duration of contact between brewing water and the coffee bed and it’s what brings the variables all together. Coffee extracts rapidly at first and slows over time as soluble elements are removed from the grounds. Too much contact time will lead to over-extraction, resulting in bitter, burnt tasting coffee. Too little contact time will result in under extracted coffee that may taste sour, salty, or astringent. You can control the time of extraction by increasing or restricting the water’s ability to flow through the bed of coffee. This can be achieved by adjusting the grind particle size, adjusting the amount of ground coffee used, or changing the dose.

WHAT BREWING MATERIALS SHOULD I USE?
-
Good Coffee
Pick a well-roasted coffee that is fresh, but not too fresh because it needs some time to rest. 3 days to 3 weeks from the roasting date is the sweet spot. You want to buy whole bean coffee so that you can grind as close to your brewing time as possible.
-
Good Water
Water quality matters a great deal. Water is your solvent; it is carrying all of the tasty coffee molecules. So, it has to have the right balance to really help your coffee shine. Distilled water won’t work because there is nothing for the coffee molecules to grab on to so they can be extracted. Unfiltered tap water has a number of mystery components that can make your brew far too acidic or alkaline. The easiest way to upgrade your brewing experience at home and ensure a better extraction is to use filtered water. (Brita, Soma, Berkey, etc.)
-
Good Burr Grinder
We’re looking for as much particle uniformity as possible. Blade grinders chop things up, which is great for spices, but bad for coffee because you have little control over the grind size. A burr grinder, on the other hand, works by passing coffee a single time through two sharp plates that are turning against one another. You have control over how close those plates are which determines the size of the coffee particles. A burr grinder produces a fairly consistent grind size. We like the Baratza Encore (it will last you a lifetime with proper care) or the Hario Hand Mill.
-
Gooseneck Kettle
This is clutch for your even water distribution goals. The long, narrow neck of the kettle gives you a lot of control of how quickly water comes out and exactly where it goes.
-
Scale
This is really important for precision of your brew. You can get a great one (that is usable for baking too!) for $30 or less.
-
Timer
This tool helps a great deal with one of the three key variables in brewing: time. Some scales have these built in, but if your scale doesn’t, you can use the one on your phone.
-
Paper Filters
There are a lot of reusable filters out there and you know we’re all about sustainability, but paper filters provide the greatest flavor clarity. Paper filters will always impart a certain amount of their mass to the hot water, and some filters have more to give up than others. We always recommend buying white, oxidized filters (“bleached” is a misnomer) rather than natural. We suggest never using hemp or bamboo. Once you’re done brewing, paper filters can go in the compost with the spent grounds.
-
Brewing Device
We’re big believers in brewing coffee you enjoy. There are a lot of devices for manually brewing coffee at home. Each of these devices have their own characteristics. Some are designed for full immersion brewing, (the grounds stay suspended in brewing water for the entirety of extraction) such as the French Press. Others are variations on the popular pour-over cone style that are used to bring a bit more clarity and acidity (Chemex, V60, or the Kalita Wave.)
LET’S BREW: PUTTING IT ALL TOGETHER
For the sake of ease, we’re going to use the example of brewing a 12oz cup of coffee on a Kalita Wave. The methodology will adapt to any pour over device. If you want to get into the weeds on how to brew on specific devices, we have these great brewing guides.
Step 1: Weigh and Grind
Weigh out 25 grams of coffee and grind to the appropriate particle size for your brewer.
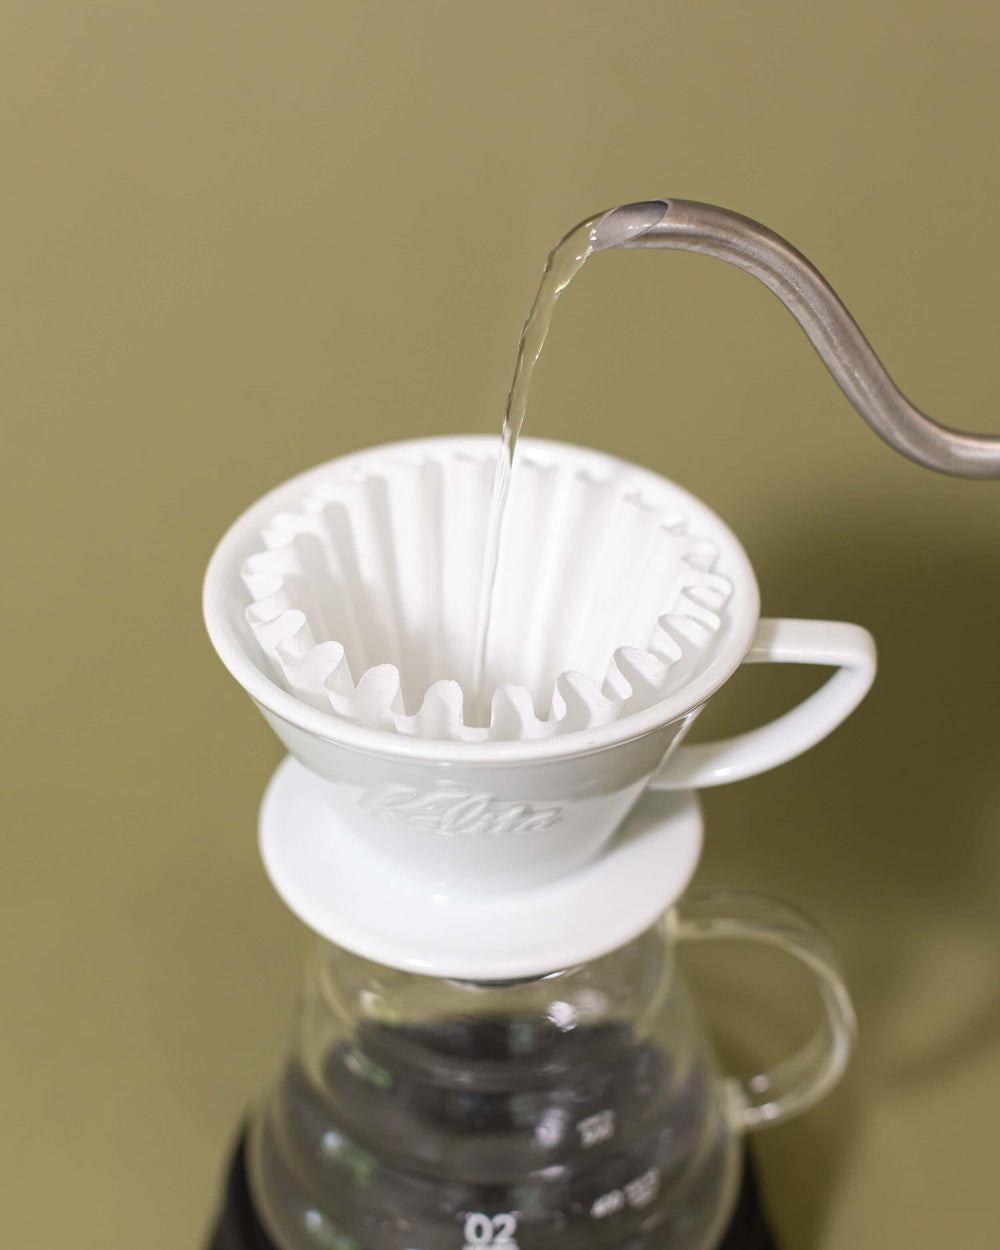
Step 2: Boil the water, rinse the filter, level the bed.
Fill your kettle with water and heat. When you hear it come to a rolling boil, remove it from heat. Use the water right off of the boil. Place the brewing device with filter over your brewing vessel. Carefully rinse the filter with boiling water, ensuring your aren’t collapsing any part of the filter. Discard the rinse water from the brewing vessel. Place brewing device and vessel on the scale and tare the scale. Weigh 25 grams of ground coffee into the filter and give a gentle shake to level the dry bed of coffee.

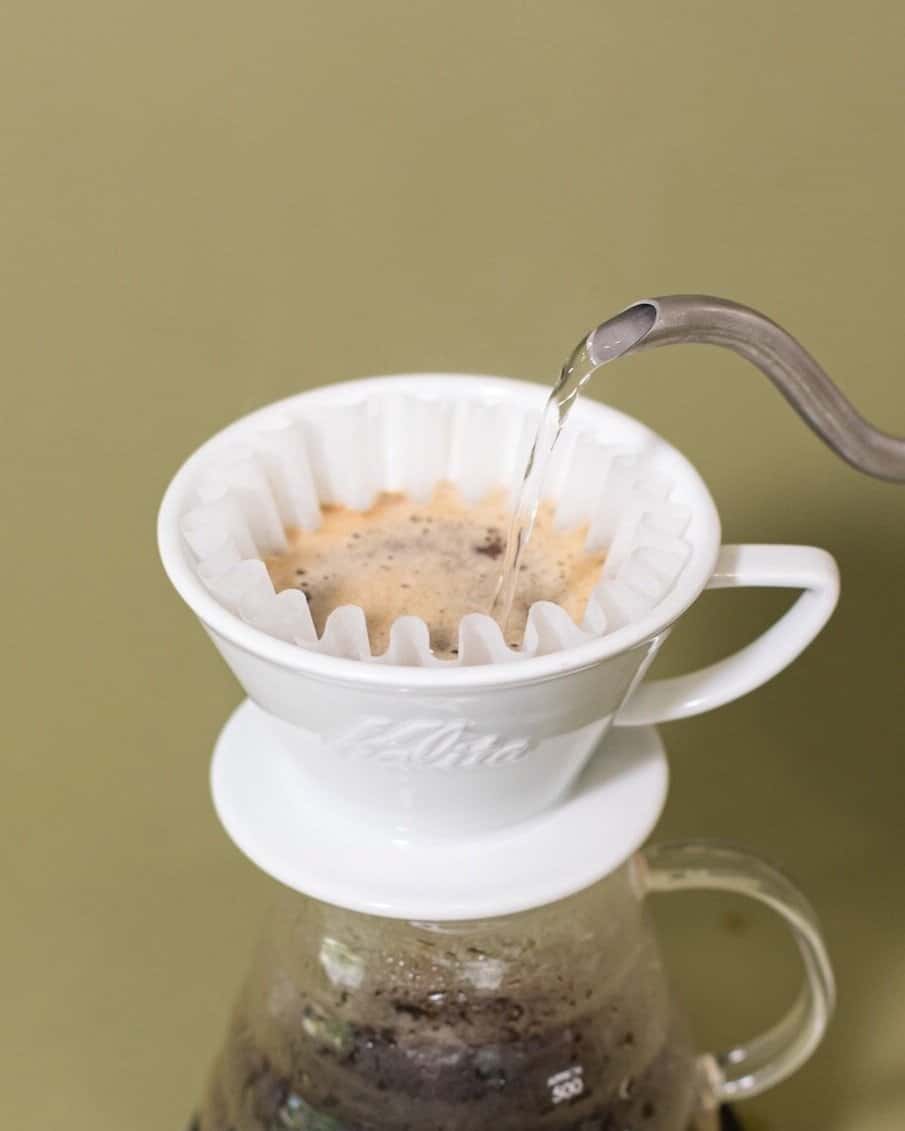
Step 3: Bloom.
Add just enough water to fully saturate all of the grounds, about 1-2 times the weight of the ground coffee used. Wait 30-45 seconds or until the bed stops expanding and bubbling.

Step 4: Pour one.
Pour 50-80 grams of water in concentric circles to further saturate the bed, and bring the slurry about ⅓ of the way up the brewing device. The first pour can also affect how quickly the coffee will brew. If you do a very heavy first pour, the coffee tends to brew faster and vice versa.
Step 5: Submerge the Crust.
As you’re brewing, you will notice that much of the coffee will be floating on the surface of the slurry. This is partially because there are still gases being released and causing the particles to remain buoyant. As they reach an equilibrium, the particles will descend and join the rest of the slurry, but until then, it is necessary to keep submerging them to maintain a consistent extraction. Use a paddle or a spoon to gently dunk the crust until it dissipates and leaves only a thin film of oils and froth on the surface. You can also use a thin stream of water from your pouring kettle to submerge and agitate the crust until you achieve the same result. This takes a little more practice to do consistently and evenly, but can be more efficient. No matter which method you use, you want to make sure that you are not agitating the coffee more than necessary.

Step 6: Pour the rest of the water.
Pour the rest of the water in concentric circles using a pulse pour method, which means that you will do several short pours to maintain roughly the same water level throughout the brew. For the Kalita, you want all of your water to be added by 2:30-2:45 minutes.

Step 7: Stir the slurry.
Once all of the water has been added, give the slurry three slow revolutions at a very shallow depth to get everything moving. You want to pull away the particles that have attached themselves to the side of the filter or vessel into the middle to ensure the most even extraction. You can judge how well your brew went in part by the way the bed looks at the end of the brew. If your method uses a cone or truncated cone (i.e. Chemex or V60), the bed should be slightly domed. If the method is flat (i.e. Kalita), the bed should be flat.

Step 8: Stir the final brew.
At around 3-3:30 minutes (for the Kalita), all the water should be drained through. Remove the brewing device from the brewing vessel and stir the coffee thoroughly. This ensures that all of the extractions that happened throughout the brewing process are well incorporated and the final brew is balanced.
Step 9: Serve.
Pour the finished coffee into your favorite mug and enjoy! You’ve made a beautiful cup of coffee.
Note: We go over this entire brewing method in our companion YouTube video, found at the bottom of this post.
LEARNING FROM EACH BREW
While the steps we laid out will produce a great cup of coffee consistently, every coffee is a little different, and coffees will change a little as they age. So, you may have to adjust your method here and there to get a cup you love every time. Remember the variables you have at your control: temperature, turbulence, and time, and you’ll do just fine. Each time you make coffee, make a mental note of what you did and how it tasted. If the result was a little sour and flat, try making your grind finer, or agitating your coffee less (with fewer pours or fewer stirs.) If the coffee tasted bitter, try making your grind coarser, or agitating your coffee more (with more frequent pours.) If the coffee is everything you ever dreamed, excellent work!
Now, put your brewing knowledge to use and grab a bag of coffee!
YOUTUBE VIDEO: HOW TO BREW GOOD COFFEE AT HOME
← Older post Newer post →